Learning how to use your camera in manual camera mode is easy to do. It is essential know-how if you want to get correctly exposed photographs, especially is you shoot with flash.
First, an explanation of Aperture, Shutter Speed and ISO and the so-called Exposure Triangle.
The Exposure Triangle
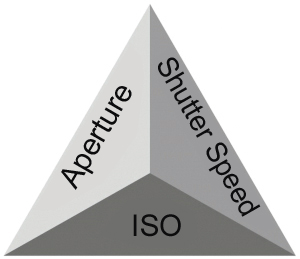
The exposure of every photo, no matter how dark or light it is, is determined by three factors:
1 – Aperture
2 – Shutter speed
3 – ISO
1 – The Aperture
This term refers to the size of the opening inside the lens of the camera. It determines the amount of light passing through the lens opening and is transported to the sensor.
- With a wide aperture such as f/4 there will be a large amount of light passing through the lens opening to reach te sensor. Shutter speeds will be relatively short.
- With a small aperture such as f/22, it takes longer to let the light pass through the lens opening before it reaches the sensor. This results in longer shutter speeds.
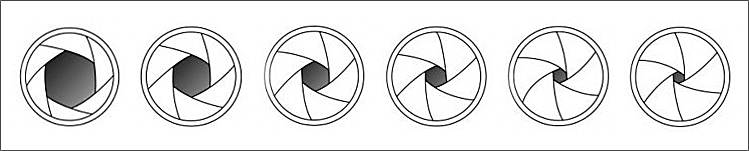 The scale with aperture numbers is as follows:
f/1.4, f/2, f/2.8, f/4, f/5.6, f/8, f/11, f/16, f/22. The lower the f-number, the wider the aperture.
We call every subsequent number a full stop in relation to it previous. So from f/8 to f/11 is a full stop. There are partial (1/2 or 1/3) stops between them. This is indicated, for example, by f / 4.5, f / 6.7, etc.
At the aperture value, each stop is a factor of 2 in the area from the aperture of the lens. That means that every stop is half or it transmits double the amount of light.
2 – The Shutter Speed
The shutter speed is the period of time in which the shutter opens and closes again. As long as the shutter is open, the light is admitted to the sensor. The longer the shutter is open, the more light falls on the sensor.
These numbers of shutter speeds are fractions of seconds and are like follows:
1/8000sec, 1/4000sec, 1/2000sec, 1/1000sec, 1/500sec, 1/250sec, 1/125sec, 1/60sec, 1/30sec, 1/15sec et cetera.
In photography terms, every number is a full stop compared to the previous one. However, there are partial (1/2 or 1/3) stops between them. This is indicated, for example, by 1/200sec, 1/40sec, etc. At the shutter speed, each stop is a factor of 2 for the period that the shutter is open. That means that every stop is halved or doubled is of the exposure time.
3 – ISO
ISO is the international term for light sensitivity. It determines the light sensitivity of the sensor. The higher the ISO setting on the camera, the less light is required to make a properly exposed photo.
The numbers of ISO are a standard series. On most cameras the following ISO values are supported:
100 ISO, 200 ISO, 400 ISO, 800 ISO, 1600 ISO, 3200 ISO and 6400 ISO.
We call every number a full stop compared to the previous one. There are partial (1/2 or 1/3) stops between them. This is for example indicated by ISO 640, ISO 320 et cetera. At ISO, each stop is a factor of 2 in the required amount of light for the exposure of a photo. That means that every stop is half or twice the amount of light.
The Exposure Triangle in a Photo
Assuming the photo has to get a technically correct exposure, you choose a certain combination of aperture, shutter speed and ISO. This depends on the amount of ambient light in the scene.
 This photo is taken with f/5.6, 1/500sec and 400 ISO.
Suppose you want a smaller lens opening and change the aperture from f/5.6 to f/8. This means that half of the light is allowed to the sensor. To maintain the same exposure you can either double the shutter speed or the ISO value.
The photo above would therefore have the same exposure with the following settings:
f/8 – 1/250sec – 400 ISO (one stop compensation with the shutter speed)
or
f/8 – 1/500sec – 800 ISO (one stop compensation with the ISO)
In short, a change in one factor from the exposure triangle means that you have to change one of the other two factors in proportion to get the same exposure. If you don’t, the photo will become lighter or darker.
Taking Photos in Manual Camera Mode
In manual mode you need to set aperture, shutter speed and ISO manually. Which settings you choose depends on the amount of light present in the scene. The light is measured with the so-called reflective light meter.
Automatic Reflective Light Meter
Mirror reflex and system cameras have a built in automatic light meter. It measures the amount of light in a particular scene and will advise you of the best settings to use for the scene.
The light meter in different types of cameras display a “0” in the center and a “-” point and “+” point on the left or right.
It can be displayed as in this image and appears at the bottom of the viewfinder image or on the LCD screen at the rear of your camera.
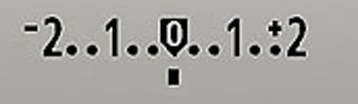
The black bar on this light meter indicates that the camera is a average exposure in the image recognized. In general the photo will be well exposed to be. If the bar is on the “-” side , the photo will be underexposed and if it is on the “+” side then the photo will be overexposed.
The light present in a scene is reflected; measuring sensors the incoming at various points across the image plane reflected light. Light and dark appear in most images shades in front, theoretically that varies from white to black. The average is then approximately gray. The camera therefore assumes that the average of each shot must be gray. In professional terms one speaks of 18% gray. Let’s take the example photo of the
Let’s take a closer look at the green façade.

The light meter searches for an average exposure. The automatic light meter in the camera calculates the exposure based on of the reflected light from the scene. The entire scene reflects medium tones. There are no extremely light or dark surfaces in the picture.
The light meter in the viewfinder of the camera is set to “0”. With f/5.6, 1/2000sec and 100 ISO the photo is correctly exposed. In general you can say that you have an average light reflection in the viewfinder image you can trust that the “0” on the light meter is a correct indication. But in certain situations the light reflections are extremely high or low.
Deviating Light Reflections
Not every photo contains an average light reflection – at varies per scene. It is mainly determined by the color and material of the subject. White reflects more light than black, a shiny object reflects more light than one matt object, a white, fully cloudy sky reflects more then light a blue sky. Bright scenes cab reflect 50% more light, while dark scenes hardly reflect more than 7% of the light. The light meter in the camera does not take this into account.
Overexposed photos
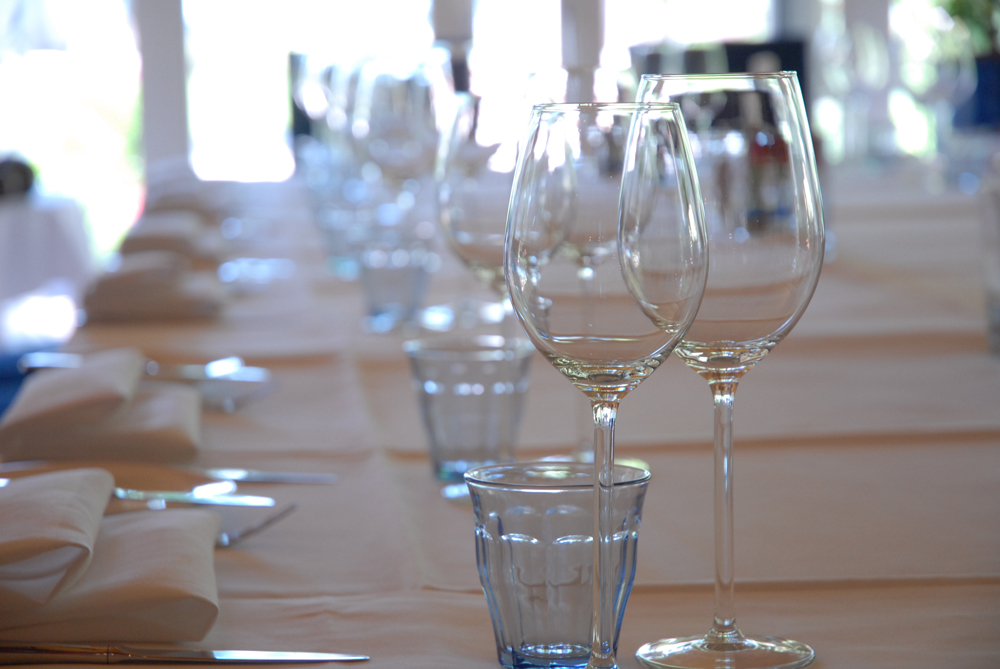
Suppose we photograph a scene with lots of light tones. For instance like the pictures of the table setting.
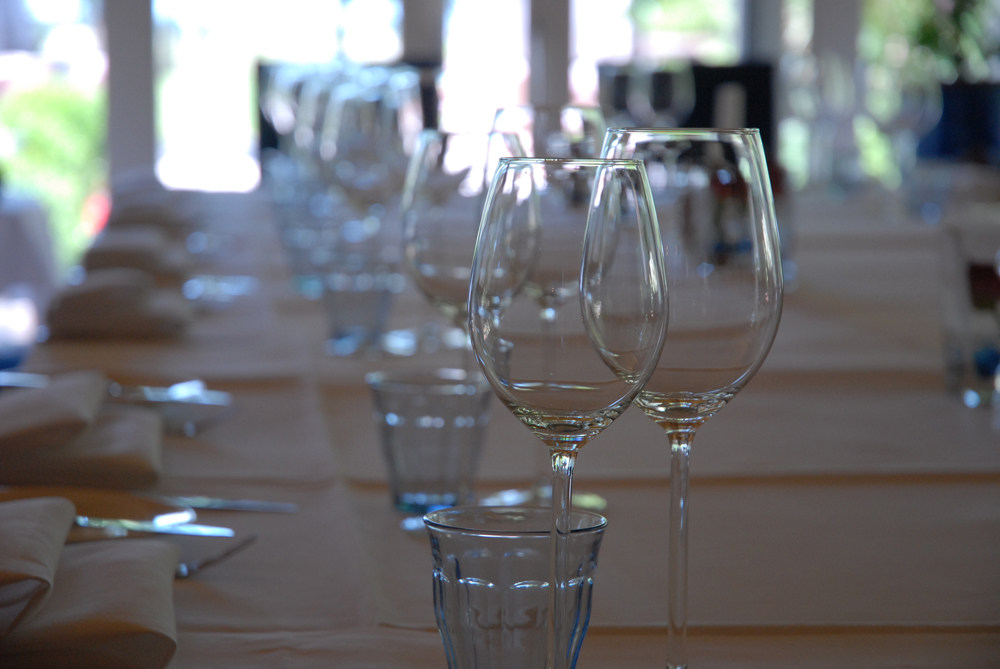 The settings on the camera are f/4.5 – 1/125sec – 400 ISO. De lightmeter indicates “0”. Unfortunately, the photo is underexposed. The camera thinks there is enough light to the sensor to make a properly exposed picture. That is not the case. The white tablecloth and the light on the background reflects much more light than average! The automatic light meter is apt to go to “0”, which makes the scene too dark. The light meter actually needs to be corrected. At the following photo we compensate the light by setting the light meter to the “+” side. This is called overexposure.
 We take the photo again but now with a compensation in the exposure of one stop. We change the shutter speed from /125sec to 1/60sec. The shutter is now open for a longer period of time. The light meter is set to the “+” side and results in a well exposed photo.
Underexposed Photos
Photos that contain dark areas must be underexposed. Just like the images below.
 This scene mainly covers a dark subject. The light meter is set at “0”. It detects only a little refection, therefore the exposure will be too long. It results in an overexposed image. The light meter should be set to the “-” side.
 BiHere we have intentionally corrected the light meter. We underexpose the photo with one stop by setting a faster shutter speed, from 1/30sec to 1/60sec. Because the shutter is open for a shorter period of time, there is less light going to the sensor. Now is the photo well exposed.
Compensating stops
Compensating stops can either be done with shutter speeds (as we did above), or with aperture and/or ISO. A stop is a stop – compensating can be done with any of these three.
Now go and try for yourself with the following exercises.
Exercise A: photographing a subject with neutral tones
- Take the shot outside, on a cloudy or sunny day.
- Choose a random scene with neutral tones. Make sure you (sun) light in your back.
- Set the camera in “M” mode.
- Choose a setting of f/5.6 and ISO 200 on your camera.
- Place your camera on a tripod and point it at a scene with average reflections, so not too many light or dark surfaces
- Press the shutter button halfway to active the automatic light meter – it will be visible at the bottom of the viewfinder or on the back of your camera’s LCD screen. The reflicting light from the scene is now measured.
- Choose a shutter speed but make sure to have “0” in the middle of the light meter.
- Take the photo. If you have followed the steps correctly, the photo is correctly exposed.
- Leave your tripod where it is and take a photo where you intentionally overexpose the image with two stops. Choose a larger aperture, a slower shutter speed or a higher ISO setting. The photo will become (too) light – also the light meter moved to the “+” side.
- Take exactly the same photo but now you underexpose it with two stops. It’s irrelevant if you underexpose the photo with a smaller aperture, a faster one shutter speed or a lower ISO setting. The photo will be (too) dark and the light meter has moved to the “-” side.
Exercise B: photographing a subject with bright tones
Choose a subject with bright tones, for instance white mushrooms or sugar cubes on a white background.
- Set your camera at f/5.6 and 200 ISO.
- Place your camera on the tripod and point it at the subject.
- Press the shutter button halfway, the light reflected from the subject will be measured.
- Choose a shutter speed but make sure to have “0” in the middle of the light meter.
- Take the photo. If you have followed the steps correctly, the photo is underexposed.
- Now take the same photo but with compensation of the light. Choose a larger aperture, a slower shutter speed or a higher ISO setting or a combination. The light meter moves to the “+” side. Compensate repeatedly until the subject is properly exposed.
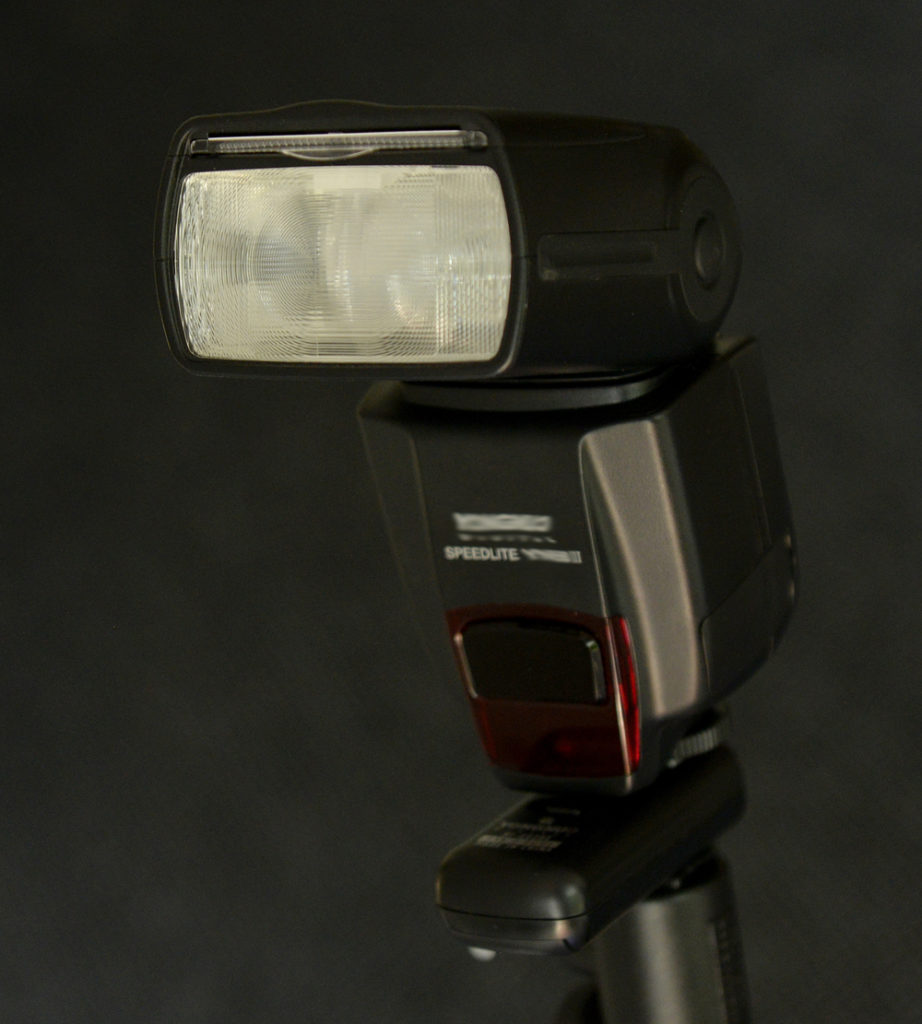
Exercise C: photographing a subject with dark tones
Choose a subject with bright tones, for instance black peppers or a black Mobile phone on a black background.
- Set your camera at f/5.6 and 200 ISO.
- Place your camera on the tripod and point it at the subject.
- Press the shutter button halfway, the light reflected from the subject will be measured.
- Choose a shutter speed but make sure to have “0” in the middle of the light meter.
- Take the photo. If you have followed the steps correctly, the photo is overexposed.
- Now take the same photo but with compensation of the light. Choose a smaller aperture, a faster shutter speed or a lower ISO setting or a combination. The light meter moves to the “+” side. Compensate repeatedly until the subject is properly exposed.